

Tree Planting Practices an Overview
Update: This article is currently being revised with new text and photography. While the information on planting box grown desert trees is essentially correct, current horticultural thinking discourages the use of tree stakes in both nursery production and tree planting.
PLANTING HOLE EXCAVATION:
The planting hole should be 5 to 10% shallower than the height of the container being planted with the bottom of the box sitting on level, undisturbed soil (Figures 1, 2 and 3). This depth keeps the root ball from settling deeper into the ground and possible causing the crown (the transitional tissue between the roots and shoot of the tree) to become buried. Where practical, the width of the hole should be 3 to 5 times the width of the container. Fracturing the soil 3 to 5 times the width of the container is also applicable and more cost effective (Figure 4 and 5). This large area of disturbed soil will be more easily penetrated by water and roots, leading to a dispersed, well distributed root system. Set tree with box still assembled into the prepared planting hole.
REMOVING BOX, ROOT PRUNING AND BACKFILL:
Root pruning, at the time of transplantation, promotes improved long term root distribution, serves to stimulate new root development into the surrounding native soil and reduces the likelihood of binding or circling roots. Methods of root pruning will vary with the container size, the density of the root mass, volume of the root mass and the planting medium. Applicable methods include hand saw, power hedger, or sharpened spade. Root pruning is not recommended for seed grown Cercidium praecox planted during the late Fall and Winter months as this may result in tree failure at bud break.
For well rooted, container grown trees, and prior years field dug trees remove the sides and carefully examine the roots. Pruning away ¼”to ½” (or more for larger trees) of the outer edge of the rootball, removing any matted, kinked, and circling roots, corrects any developing root defects and directs radial root growth outward into the surrounding native soil (Figure 7A). For current year field dug trees: set tree with box bottom and sides intact into prepared planting hole, remove all but the top most metal strap from the box before backfilling (Figure 7B, 8, 9, 10 and 11).
Do not add organic amendments (mulch, peat moss, compost, manure) to the backfill soil. Refill the planting hole with the soil removed during excavation process. This insures that the backfill will create a soil profile essentially identical to the surrounding soil (Figure 6) and encourage uniform water penetration from the transplanted rootball to native soil. For current year field dug trees: Backfill the planting hole about 2/3 to ¾ of the way to the top of the box before removing the top metal strap (Figure 12 and 13). Remove box sides (Figure 14 and 15). Pack backfill soil to eliminate air spaces and to further secure the tree in the ground (Figure 16 and 17). For well rooted, container grown trees, and prior years field dug trees backfill the planting hole, pack backfill soil to eliminate air spaces as noted above. Make sure not to add soil on top of original rootball, keeping rootball and root flair 5 to 10% above grade.
Chemical fertilizers should be applied to the surface of the soil and "watered-in." A temporary tree well will help contain post installation irrigations allowing soil to settle and fill any remaining air pockets in the backfill (Figure 18 and 19). Once final grade is established (Figure 20), mulches (wood chips, compost and decomposed granite) can be applied to the surface of the soil to reduce evaporation of water from the top layer of soil. During hot spring, summer and fall months, when soil temperatures are high and water content is very low, pre-soak the sides and bottom of the planting hole before setting the tree in the hole. With a hose, run water into the planting hole while backfilling, moving the hose repeatedly to saturate and cool the backfill mix. Watering while backfilling will assist in settling the backfill soil and helps eliminate air pockets. Tamp and pack backfill soil as described above.
IRRIGATION: SET-UP AND SCHEDULES
Irrigation systems must be flexible enough to meet the immediate water needs of freshly transplanted tree and that same tree as it matures. As trees grow, and distance from the trunk to the tip of the drip line increases, the irrigation system must be expanded (extended) so it can deliver water over an ever larger area of soil beneath the tree. A limited number of immovable emitters produce a physically restricted root system and tends to keep the soil nearest the trunk saturated during and immediately following irrigations. These two conditions can make trees more prone to wind throw.
Extending the irrigation system beyond the original rootball should begin in the design phase (and be incorporated into the construction documents), implemented at installation and be monitored through establishment and maturity. One alternative arrangement is to install concentric rings (see diagram 1) of emitters that extend out to the drip line of the tree. Such an arrangement would distribute water over a much larger area and result in a more highly dispersed root system. A second alternative would be to arrange 13 emitters in an X pattern (Diagram1) rather than the rings. In either configuration, the emitter(s) nearest the trunk acts to help settle, compact and firm the soil around the freshly transplanted root-ball. Shortly after transplanting these emitters should be closed or capped and those near the tip of the drip line should remain opened. The capping of emitters allows the soil nearest the trunk to dry out and firm up, helping to avoid wind throw. The emitters watering the soil profile near and beyond the drip line will be irrigating the newly developing feeder and anchoring roots. This management approach encourages greater root distribution and a larger total root mass that is physically proportional to the trees above ground trunk, branch and foliage mass.
WATERING GUIDE:
The frequency of tree irrigation will depend on soil type and texture, maturity of the tree, and the time of year (day and night temperatures). Sandy, more porous soils will require more frequent application of water than will loamy and clay bearing soils. Similarly, the duration of the irrigation will depend upon the number of emitters and the volume of water per hour they deliver, the growth stage of the tree and the time of year. Immediately following transplantation trees have the same root mass they had when in the container and should be irrigated as if they were still containerized. During this transition, irrigation schedules should be appropriate to the season and the limited distribution of the roots. Depending on the time of year it may take several weeks or even months before the roots of transplanted trees explore beyond the original growing container. Post installation irrigation must take into account the soil type and drainage characteristics, day and night temperatures, relative humidity, other potential sources of water (lawn irrigation, rain gutters, general site drainage and other sources) and the differing tolerance of desert tree species to saturated soils. Trees irrigated using a hose must be watered regularly, frequently and slowly, distributing the water from the original rootball out beyond the developing drip line.
For further information on watering, The Desert Botanical Garden, Phoenix, Arizona, has developed a useful watering guide that can be accessed from our web site www.aridzonetrees.com or from their web site www.dbg.org .
POST-INSTALLATION PRUNING:
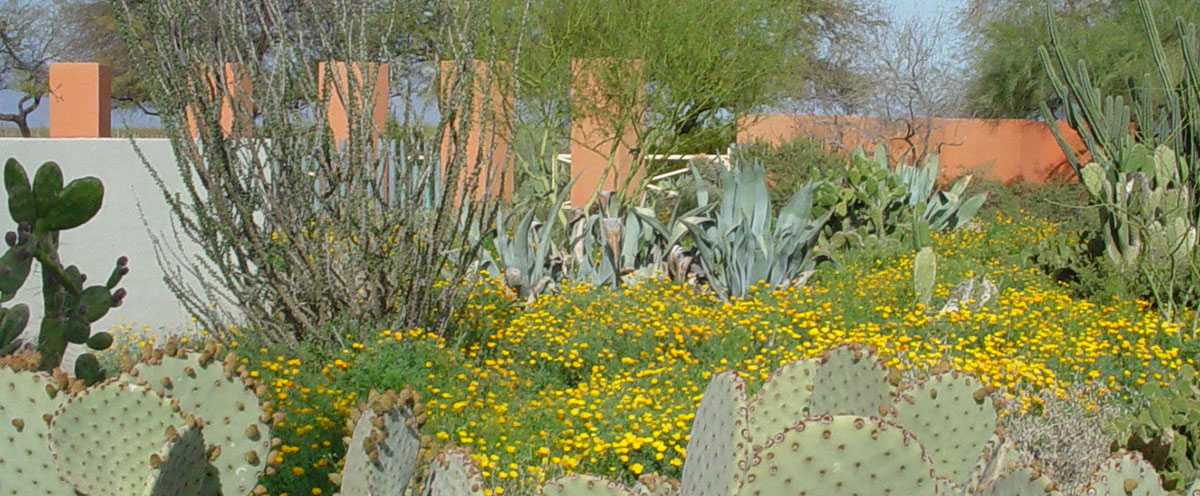
Pruning immediately following installation reduces the tree's capacity to photosynthesize and only serves to slow new root, stem and leaf growth and can delay tree establishment. Such pruning is considered unnecessary and potentially detrimental. Prune only broken or damaged limbs. Selecting trees with form and structure that are appropriate for the particular landscape setting should reduce the need for significant pruning following planting. Follow the 80/20 pruning guideline (see below) whenever you prune.
POST-INSTALLATION FERTILIZING:
Applying fertilizer formulations that contain nitrogen and phosphorous immediately following transplanting, in either granular or liquid form, promotes rapid vegetative growth and contributes to new root development (Figure 21). In nutrient poor soils it may be desirable to use a formulation adding potassium (Potash) and micronutrients. When using dry fertilizers the best results are with homogeneous formulations. In these formulations each granule of product has the same nutrient concentration (e.g. 20% N, 20% P and 20% K). Blended NPK fertilizers (e.g. 20-20-20) are separate nitrogen, phosphorous and potassium granules mixed together. To provide nutrients for both existing and developing roots distribute fertilizer uniformly beneath the leaf canopy from the trunk to just beyond the drip line. Irrigate generously following application to allow fertilizer to penetrate into the root zone. Fertilizers applied in the cooler months, when little if any tree growth occurs, have no immediate effect on establishment. An application at bud break is recommended. Read and follow the recommended application rates and re-application intervals listed on the package for the specific fertilizer product used.
PRUNING ESTABLISHED TREES:
Periodic light thinning is the most desirable method of pruning for recently transplanted trees. Light thinning, especially important in June, July and August can reduce the number of wind-damaged branches and prevent uprooting of trees. Removing large portions of the tree canopy (more than 30%) during any one pruning session in the summer growing season, can lead to aggressive, unwanted re-growth, limited root development and increased vulnerability to sunburn injuries that can be colonized by wood boring insects. No more than 20% of the tree foliage should be removed at any one time with 80% of this pruning concentrated on the new growth on the outer third of the canopy. Limbs pruned from these areas should be no larger than about ½ inch in diameter and should require only hand pruners to remove. The remaining 20% should be pruned from the inner two thirds of the canopy removing succulent ("water") growth and crossing branches. Crossing branches or succulent growth should be removed from this inner 20% periodically throughout the growing season as some of these "temporary" branches serve to help permanent branches develop caliper, taper and greater strength.
Avoid hedging or heading back desert species, as this will only stimulate excessive, unwanted branching. Some desert species are slow to exhibit the effects of freeze damage. Branches that do not immediately produce leaves in spring may not be damaged. Delay pruning suspect branches until the tree has begun producing new leaves. Realize that early season pruning can reduce spring flowering. Always use clean, sharp tools that are frequently cleaned in a freshly prepared solution of 10% bleach and periodically sharpened. Bleach acts as a sterilizing agent and help prevent the spread of diseases within and between trees being pruned.
FERTILIZING ESTABLISHED TREES:
The majority of arid landscape trees have evolved in, and are well adapted to, nutrient poor soils. The lack of rainfall and the limited availability of nutrients serve to moderate the growth of trees in the native Sonoran desert and likely explains why wind throw is rarely or ever seen in undisturbed desert settings. Water and fertilizer are effective tools for managing tree growth and overall health of desert trees in landscapes. When trees approach or reach the desired size, reducing or eliminating the application of nitrogen and irrigation will slow or moderate growth. Slower growth of maturing trees limits the severity of branch damage from summer wind storms, reduces the risk of wind throw, and limits the amount of annual pruning required. Late summer and early fall applications of nitrogen can encourage late season vegetative growth that is more vulnerable to freeze injury in winter. Read and follow the recommended application rates and re-application intervals listed on the package for the specific fertilizer product used.
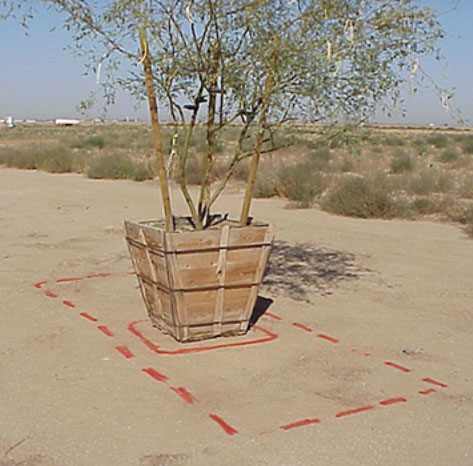
Figure 1. Select tree with a form and shape that compliments all the use of the landscape and does not adversely impact surrounding plant material, turf, pedestrians, signage, or hardscape elements. Solid line indicates planting hole, broken line indicates area of fractured soil.
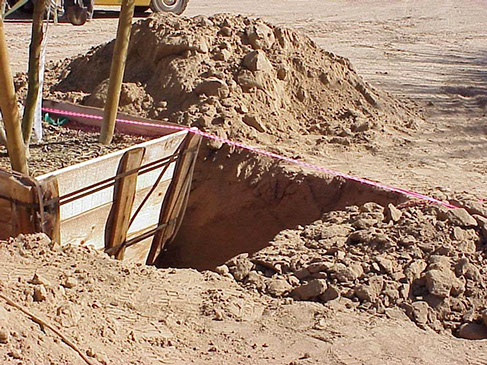
Figure 2. It is not necessary to remove the bottom of the box. The bottom of the box should sit on undisturbed soil and the crown of the tree should be about 2" to 4" above the finished grade.
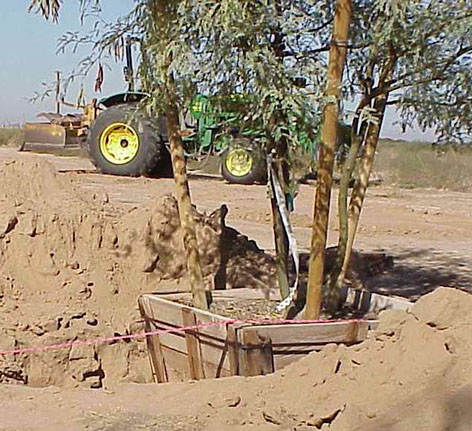
Figure 3. Leaving tree slightly above grade insures that if rootball settles that crown will remain at or above grade.
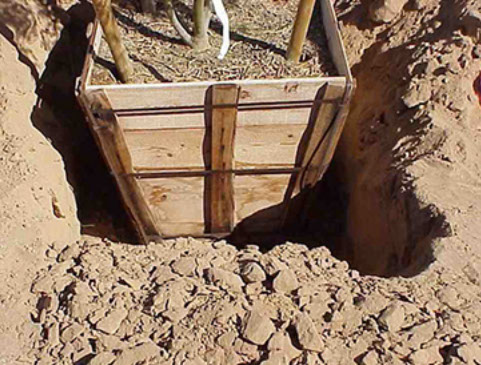
Figure 4. Where it is not cost effective to dig a wider planting hole, fracture soil to promote root development.
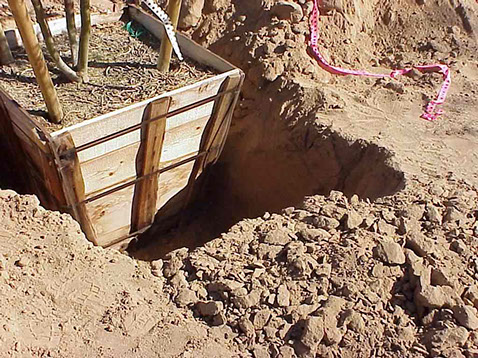
Figure 5. Fractured soil improves water penetration and root distribution.
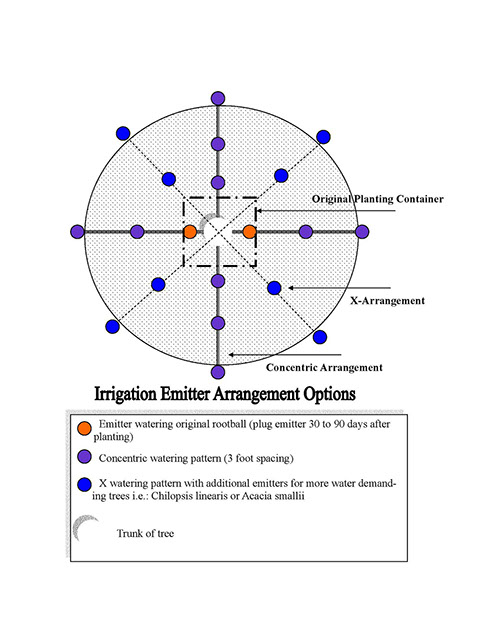
Diagram 1. Arrangement of irrigation emitters in a concentric pattern, starting at the trunk and extending to the edge of the leaf canopy.
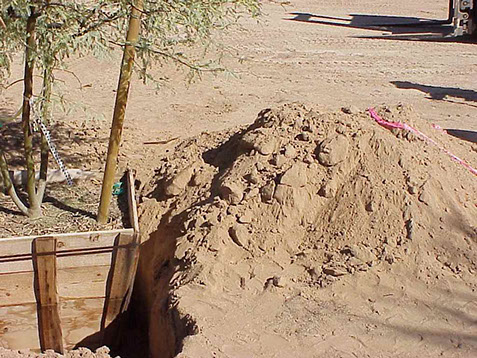
Figure 6. Back fill with the soil removed from the hole to create a good interface between the rootball and the surrounding undisturbed soil.
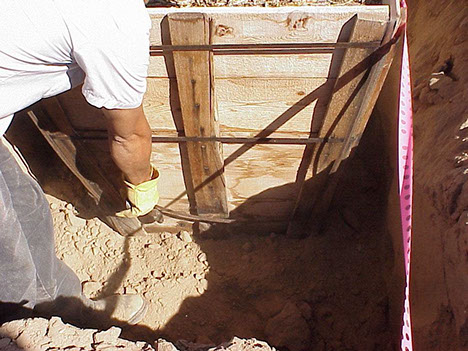
Figure 7. Cut bottom band first.

Figure 8. Cut the middle band second.
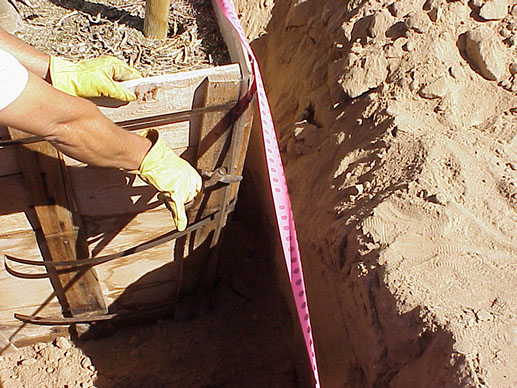
Figure 9. Cut vertical bands next then cut the top band last.
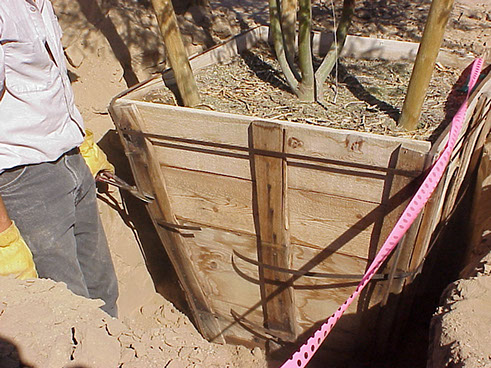
Figure 10. It is not necessary to remove the bottom of the box. Remove all straps from the planting hole.
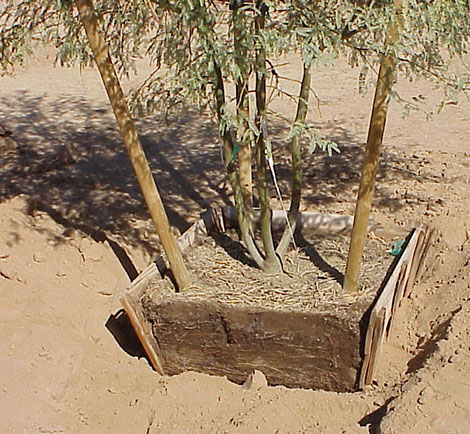
Figure 11. Remove box sides, one at a time.
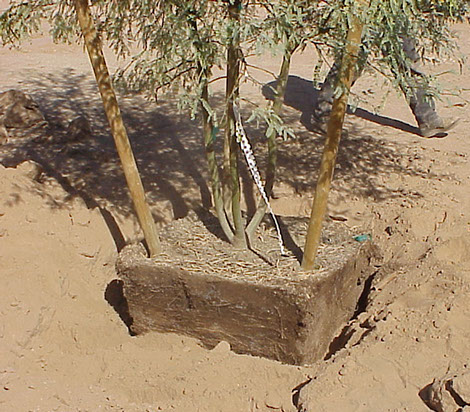
Figure 12. When all 4 are removed, complete backfilling the hole.
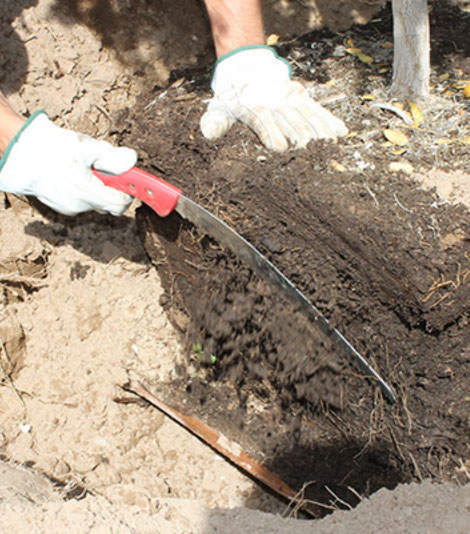
Figure 13. For well rooted container grown trees and prior years field dug trees prune away 1/4 to 3/4" of the outer edge of the rootball removing any matted, kinked and circling roots.
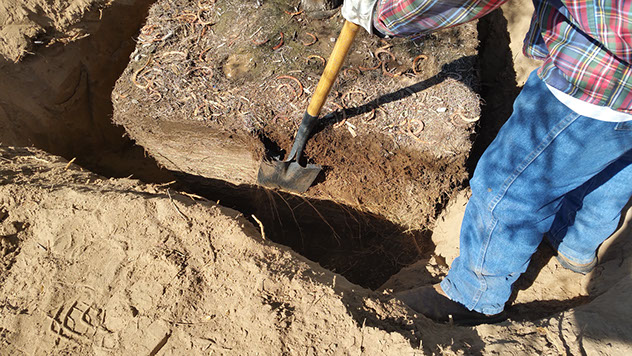
Figure 14. Prune rootball with a saw or sharp spade removing outer edge of rootball.

Figure 15. While backfilling hole with native soil add water to eliminate air pockets.
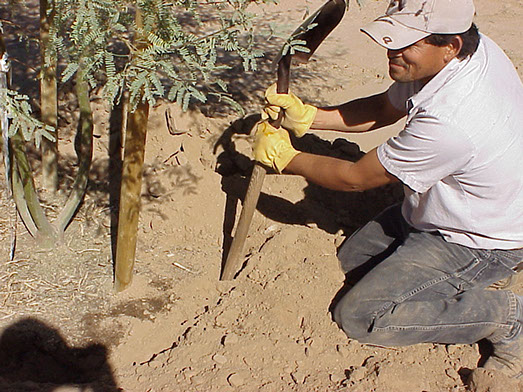
Figure 16. Using the shovel handle, periodically tamp the backfill to remove air pockets.
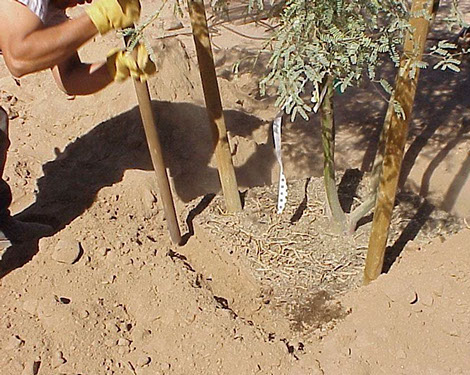
Figure 17. Continue compacting the backfill until you reach the finished grade.
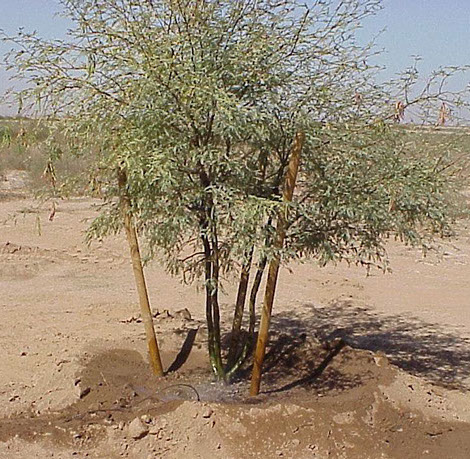
Figure 18. Set-up a temporary tree well for the initial 1st and 2nd deep irrigations to help further settle the back fill.
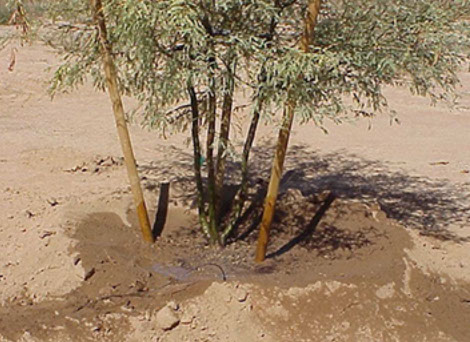
Figure 19. Deep irrigations allow surface applied fertilizer to penetrate into the rootball. Grade down temporary tree well exposing root-ball 1-2 inches above grade for top dressing with mulch/ decomposed gravel/ granite.

© Copyright 2000-2020 Arid Zone Trees